

Cracking the Code to Multimodal AI Pipelines
Building efficient Multimodal Systems, unpacking Video, VLMs and Speech to Text (STT)

Welcome to Neural Bits. Each week, get one deep-dive article covering advanced, production-ready AI/ML development. Learn, understand, and build robust AI/ML systems from the ground up.
Subscribe to join 4,300+ AI/ML Engineers for production-ready insights and tips gained from close to a decade in the AI industry.
The first module on building Kubrick: The Multimodal Agent with eyes and ears.
Kubrick is an open-source, comprehensive course that walks you through building AI Agents that can process Videos, Audio, Images, and Text. You upload a video, and can start chatting with it.
This course is structured in 6 modules, where you will learn how to:
Build Multimodal Data Pipelines, MCP Servers, and Video-RAG.
Build Tool Calling Agents from scratch, in Python.
Design a production-ready AI System, with LLMs, VLMs, RAG, and LLMOps.
Best practices in Python, FastAPI, and ML System Design.
📌 Here’s what Kubrick can do:
This course is done in collaboration with Miguel Otero Pedrido! 🙌
Course Modules
📌 Module 1: Cracking the Code of Multimodal AI Pipelines
⌛ Module 2: Coming Soon…
⌛ Module 3: Coming Soon…
⌛ Module 4: Coming Soon…
⌛ Module 5: Coming Soon…
⌛ Module 6: Coming Soon…
Completing this course, you'll learn how to build an Agentic System that works with multimodal data. You'll gain hands-on experience in designing production-ready APIs (FastAPI) to host your agents, build MCP Servers and Tool Calling Agents, Multimodal Agentic RAG systems, and more.
This will allow us to build a Multimodal Agentic RAG and chat with Videos.

Find the complete roadmap for this free course: Kubrick Code Repository
Cracking the Code of Multimodal AI Pipelines

In this first module, we'll dive into the core components of the multimodal processing pipeline, covering video, images, text, and audio data. We'll start with a brief look at the progression of Multimodal AI to understand how we arrived at today's stage of Generative AI models that can process image, text, and audio - all at the same time, in a shared representational space.
Starting with a bit of History.
The AI research field was primarily popular in academia. While the field has steadily advanced, it wasn't until the recent boom of large language models (LLMs), such as ChatGPT in 2023, that AI truly gained popularity and widespread public attention.
Before this, AI was more specialized. For example, Computer Vision relied on architectures like Convolutional Neural Networks (CNNs), while Natural Language Processing (NLP) leveraged Recurrent Neural Networks (RNNs), with Long Short-Term Memory (LSTM) networks or Generative image generation with Variational Autoencoders and GANs (Generative Adversarial Networks).
It was in 2017 when the Transformer model architectures fundamentally changed the AI landscape. Let’s see the impact the Transformer Architecture had on Multimodal AI.
Table of Contents:
The progression of Multimodal Data in AI
Understanding Video/Image and Audio Processing
Understanding Pixeltable
Building our Multimodal AI Pipeline using Pixeltable
[Optional] Understanding the AI Models
Conclusion
Why is this course free?
1. The progression of Multimodal Data in AI
Let’s start with a short definition.
Multimodal AI refers to machine learning models capable of processing and integrating information from multiple modalities or types of data. These modalities can include text, images, audio, video, and other forms of sensory input.
Before Transformers, multimodality gained traction in areas like autonomous driving during the 2012-2016 period. Here, data from cameras, radar, LIDARs, and other sensors were merged to create robust "environment understanding", a concept known as "sensor fusion." This involved combining 3D point clouds with 2D images and 1D radar data to improve prediction accuracy and the “understanding” of a vehicle’s surroundings.

In real-world complex scenarios such as autonomous driving, multimodal data is key, as a single sensor often isn’t enough:
If it's too sunny, too dark, or raining heavily, camera images might become useless.
In low-light conditions, LiDAR can still provide data about the car’s surroundings.
When LiDAR fails, Radar might provide data, as it operates at lower wavelengths.
Ultrasound is good for parking assistance or covering the blind corners of the car.
As you notice, each modality is destined to enhance the data alongside other modalities, as one alone won’t be able to capture everything or work for mixed-use cases.
The challenge with multimodalities in this scenario is the data representation. Classical model architectures that worked for images didn’t work for 3D Point data. Architectures that worked on temporal 1D data didn’t work on Images, so you can see it becomes a data representation problem, as previous-gen architectures weren’t able to bring all data to a single modality.
The Transformer architecture fixed that problem with Tokens.
In transformers, every data point can be treated as a token or sequence of tokens, as the model architecture inherently understands how to interpret these, regardless of their origin.
That’s why, today we have models for Speech To Text, Text to Speech, Image to Text, Image to Video, Text to 3D, or any other combination there is, thanks to the Transformer Architecture.
Now that we have understood multimodal data, let’s go one level further and unpack what Videos, Images, and Audio streams are, and how they are interpreted by Video Players, Image Viewers, and Audio Players.
2. Understanding Video/Image and Audio Processing
Video files are highly structured and compressed containers that contain Image and Audio packets, alongside metadata that tell the video player which audio segment goes with which image sequence.
When you click "play" on a video, it might seem like a single, continuous stream of data. However, a digital video file is more complex. But we’re going to unpack that.
In the following example, we’re using Hex Fiend, an open-source HEX editor, to open and look into a short, 60-second MPEG4 (.mp4) video file.

Let’s read it and understand what all these HEX records stand for. If we follow the [idx] tags added to this image, we have the following key elements:
[1] `ftypisom` - This is part of the first header, and it specifies the file type, helping the player understand what type of MP4 video this is and what features it supports.
[2] `isomiso2mp41` - This specifies the more verbose capabilities of the MP4 file. Here, the iso2mp41 part refers to the ISO base media file format, which is the standard structure for multimedia data, such as video.
[3] `mdat` - This flag represents the start of the data container. The video player, or library reading this video, will set the decoding pointer here, start iterating compressed packets, and decode them into either an Image or an Audio wave.
Now, with each packet that we read, we can decode it in either an Audio Frame or a Video Frame (image).
To better understand how Images and Audio can be stored and synced in a single video container, let’s see how video encoding/decoding works using this diagram:

Great, now that we’ve understood how we get Images and Audio segments out of a video file, we’ll jump into preparing our Multimodal Processing flow using Pixeltable.
3. Understanding Pixeltable
Before diving into our Multimodal pipeline implementation, let’s first get an understanding of what Pixeltable is, what it does, and how it works. A great starting point for that is this lightning 2-minute demo presented by Aaron Siegen, Chief AI Officer of Pixeltable.
In here, Aaron shows how to build a fast Object Detection pipeline in Pixeltable, using the following workflow:
Create a new table with a `video` column and insert a new video into this table.
Then, using `create_view` and the FrameIterator, which receives the `video` column of the table as input, and will create a dynamic view containing all the frames in that video.
Further, using the `select` query expression, we could selectively sample from this newly created view and inspect images, image timestamps, indexes, and other metadata points generated by the FrameIterator.
With the help of `computed_columns`, we could define custom transformations via user-defined functions (UDF) to any other column in the table.
This is only a small part of what Pixeltable can do, and Aaron showcased an example on Computer Vision workflows - but in Kubrick, we process multimodal data, as besides video, we also have Text and Audio.
To get up to speed with Pixeltable, there are two main components beyond creating tables and views that we need to know. How to add custom functions and how to use queries.
1/ User Defined Functions or UDFs
In Pixeltable, a UDF allows you to bring your own Python code to process a record or a set of records from a table. To define one, we need two things: to wrap a Python method using the `pxt.udf` decorator and to use the Pixeltable typing system to define the arguments.
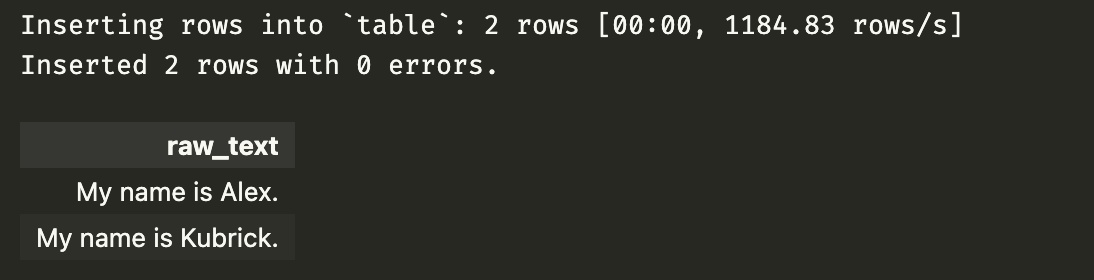
Let’s create a basic table, with a string column called `raw_text`, and insert a few dummy records into it.
my_table = pxt.create_table(
    "test.table",
    schema={
        "raw_text": pxt.String,
    },
    if_exists="replace_force",
)

my_table.insert(
    [
        {"raw_text": "My name is Alex."},
        {"raw_text": "My name is Kubrick."},
    ]
)
Now, if we call `my_table.show()`, we can see the new rows inserted.
Next, let’s define two UDFs as custom functions, one that will replace `name` with `nickname`, and another that will extract the `name` and say `Hello, {name}`.
import pixeltable as pxt

@pxt.udf
def add_hello(text: pxt.type_system.String) -> pxt.type_system.String:
    name = text.split(",")[-1]
    return f"Hello, {name.strip()}"

@pxt.udf
def replace(text: pxt.type_system.String) -> pxt.type_system.String:
    txt = text.replace("name", "nickname")
    txt = txt.replace(" ", ",")
    return txt

my_table.add_computed_column(cleaned_text=replace(my_table.raw_text))
my_table.add_computed_column(last_text=add_hello(my_table.cleaned_text))
Pixeltable updates dynamically, such that if we already have rows in our table and add a UDF as a computed column, all the rows will be processed by the UDF. If we call `my_table.show()` after adding the UDFs, we get:

And if we insert other rows into the table, they will follow the same process.
my_table.insert(
    [
        {"raw_text": "My name is Miguel."},
        {"raw_text": "My name is James Bond."},
        {"raw_text": "My name is Ace Ventura"},
    ]
)
2/ Pixeltable Queries
Queries in Pixeltable allow you to filter, transform, and extract data from tables and views. Using Pixeltable’s expressive query interface, you can build powerful data pipelines without writing complex SQL or using external transformation tools.
Queries are similar to how you’d use Dataframe operations in either Pandas or Polars. An advantage of Pixeltable is that we could also implement custom queries, following the same workflow as for User Defined Functions, only this time we wrap the methods with `pxt.query` instead of `pxt.udf`
With queries, we can filter with `where()`, order with `order_by`, limit with `limit()`, or sample with `select()`.
Returning to our example, let’s select and print the rows where it says ‘Hello, Alex`

Now that we have a better understanding of Pixeltable, let’s jump to more complex processing and unpack the full Multimodal Pipeline we’ve built for Kubrick, to process Video, Audio, Text, and Images.
4. Building our Multimodal AI Pipeline using Pixeltable
We’ll do that following a 2-step plan:
Outlining the processing workflow
Implementing and understanding the workflow
1/ Outlining the processing workflow
In short, these are the processing steps for Kubrick’s AI Pipeline.
Create a new table.
Insert One Video → [Extract Audio Channel, Extract Video Channel]
Audio Channel → Split into Chunks → Transcribe → Extract → Embed Transcriptions
Video Channel → Split into Frames → Resize → Caption → Embed Captions
Video Channel → Sample Frames → Resize → Embed Frames
2/ Implementing and understanding the workflow
In the section above, we have two steps represented in bold text: `Extract` transcriptions, and `Resize` frames. For those, we have defined custom UDFs (User Defined Functions) to implement the functionality.
We use `extract` for transcriptions because STT (Speech-To-Text) models for generating transcriptions return the result as JSON, containing the raw text transcriptions plus other metadata, and we need the raw text.
We use `resize` for frames, mainly to find a tradeoff between performance and cost, as captioning a larger resolution frame means more tokens, which means more completion tokens generated running the VLM on the image.
Let’s see the implementation:
import pixeltable as pxt
from pixeltable.functions import openai
from pixeltable.functions.huggingface import clip
from pixeltable.functions.openai import embeddings, vision
from pixeltable.functions.video import extract_audio
from pixeltable.iterators import AudioSplitter
from pixeltable.iterators.video import FrameIterator

@pxt.udf
def extract_text_from_chunk(transcript: pxt.type_system.Json) -> str:
    return f"{transcript['text']}"

@pxt.udf
def resize_image(image: pxt.type_system.Image, width: int, height: int) -> pxt.type_system.Image:
    if not isinstance(image, Image.Image):
        raise TypeError("Input must be a PIL Image")

    image.thumbnail((width, height))
    return image


video_table = pxt.create_table(
        "video_table",
        schema={"video": pxt.Video},
        if_exists="replace_force",
    )
We have the table defined and the custom UDFs we’re going to use. Let’s now add the Audio Modality:
# --- Audio Processing ---

# Add audio extraction
video_table.add_computed_column(
    audio_extract=extract_audio(video_table.video, format="mp3"),
    if_exists="ignore",
)

audio_chunks = pxt.create_view(
    audio_view_name,
    video_table,
    iterator=AudioSplitter.create(
        audio=video_table.audio_extract,
        chunk_duration_sec=10,
        overlap_sec=0,
        min_chunk_duration_sec=1,
    ),
    if_exists="replace_force",
)

audio_chunks.add_computed_column(
    transcription=openai.transcriptions(
        audio=audio_chunks.audio_chunk,
        model="gpt-4o-mini-transcribe",
    ),
    if_exists="ignore",
)

audio_chunks.add_computed_column(
    chunk_text=extract_text_from_chunk(audio_chunks.transcription),
    if_exists="ignore",
)

audio_chunks.add_embedding_index(
    column=audio_chunks.chunk_text,
    string_embed=embeddings.using(model="text-embeddings-3-small),
    if_exists="ignore",
    idx_name="chunks_index",
)
Unpacking a few key details in here, we have:
AudioSplitter uses PyAv to read the video and decode AudioFrame packets automatically, slicing and storing the audio clips in cache, based on the specified arguments. For example, in the above code block, for a 1-minute video, we’ll have 6 x 10-second audio segments.
openai.transcriptions is a built-in function that will take an Audio file, preprocess it, and use OpenAI models to generate transcriptions.
openai.embeddings is also a built-in function that follows the same approach as transcriptions, handling the pre/postprocessing of the data, and computing embeddings using OpenAI models.
In this example, we’ve used OpenAI models, but Pixeltable integrates with multiple providers, such as Groq, Anthropic, Gemini, Mistral as you can see here.
Once we’re done with the Audio modality, while processing the same video, let’s add the Image modality:
# --- Frame Processing ---
frames_view = pxt.create_view(
    frames_view_name,
    video_table,
    iterator=FrameIterator.create(video=video_table.video, fps=1),
    if_exists="ignore",
)

frames_view.add_computed_column(
    resized_frame=resize_image(
        frames_view.frame,
        width=1280,
        height=720,
    )
)

frames_view.add_embedding_index(
    column=frames_view.resized_frame,    image_embed=clip.using(model_id="openai/clip-vit-base-patch32"),
    if_exists="replace_force",
)

frames_view.add_computed_column(
    im_caption=vision(
        prompt="Describe this image in detail",
        image=frames_view.resized_frame,
        model="gpt-4o-mini",
    )
)

frames_view.add_embedding_index(
    column=frames_view.im_caption,
    string_embed=clip.using(model_id="openai/clip-vit-base-patch32"),
    if_exists="replace_force",
)
Similar to the AudioSplitter iterator for audio chunks, Pixeltable has a Frame iterator that does the same functionality for Image Frames. It opens the video, sets a sampling factor, and extracts Image frames, storing them as new rows in an inline manner.
In Pixeltable, the processed table outputs are cached, meaning that we don’t lose any of the data points we’ve generated.
When we reload the same table, we’ll get access to all the processed values in seconds. In our course use case, we store audio segments, image frames, transcriptions, and multimodal embeddings across 3 different indexes.
All of these data points participate in generating a prediction and responding to a user’s query.

With a few lines of code, we’ve built a robust multimodal data pipeline in Pixeltable that’s not only structured and robust but also versioned.
This way, once we have our table definition, with all the processing flows, if we ingest another video into the table, it’ll follow the same workflow, without duplication or re-computation.
The next section is an optional one, as we’ll cover the AI Models used within this workflow.
5. [Optional] Understanding the AI Models
Since we work with Video data, from which we extract the Audio channel and transcribe it, we use STT (Speech to Text) models.
From the same video, extracting the Image channel, we generate Image Captions to describe what’s contained in the image using VLM (Vision Language Models).
Let’s unpack how popular STT models such as OpenAI Whisper, and popular VLMs for Image Captioning such as BLIP were trained, and how they work, to get an understanding of what happens when we Transcribe audio, and Caption Images in our Pixeltable pipeline.
Speech-to-Text and OpenAI Whisper Model
Whisper is a general-purpose speech recognition model open-sourced by OpenAI. It is trained on a large dataset of diverse audio and is also a multitasking model that can perform multilingual speech recognition, speech translation, and language identification.
The pre-training dataset for Whisper was composed of [audio, transcript] pairs. The model architecture for Whisper includes both Encoder and Decoder Transformer heads, which is different compared to most popular Language Models, which are decoder-based architectures only.

Shortly, to explain how the whisper model pretraining works:
Encoder: The encoder takes the audio segment and converts it into a spectrogram, which is a digital representation of sound waves. The encoder transformer block first compresses the spectrogram using Conv1D (1D Convolution layers) and then passes it through the self-attention layers to produce high-level embeddings of it.
Decoder: Now, the decoder is responsible for `generating` the sequence of text tokens that correspond to the audio segment, guided by the high-level embeddings produced by the encoder via cross-attention.
Now, using this architecture and a dataset of 680k hours of audio and transcript pairs, we’ve got a robust STT model.
Vision Language Models
In Kubrick, we use VLMs (Vision Language Models) to caption/describe the contents of an image to enrich our retrieval context.
Keeping the same understanding as for Whisper STT (Speech to Text), VLMs that can describe (caption) images follow the same pattern, where we have a Vision Encoder and a Language Decoder.

Similarly to the Whisper architecture above, VLMs feature a ViT (Vision Transformer) Encoder that processes and understands Images, and a Language Model, in the case of BLIP, a BERT Transformer to predict text tokens and generate image captions.
The Image Encoder: handles an image being passed through and splits it into smaller patches, applying self-attention to capture high-level features and generate visual embeddings.
The Language Decoder: processes the sequence of tokens (e.g., initial text description), and through Cross-Attention to the image encoder's output, it maps the visual features with its developing text sequence.
This process enables the model to learn and generate the sequence of tokens that compose the image caption.
And done, you’ve now learned how the OpenAI Whisper model works and can generate accurate transcriptions, and you’ve also learned how a big majority of VLMs (Vision Language Models) work, to understand images.
6. Conclusion
This article was long and packed with advanced details.
In the first lesson of the Kubrick: The Multimodal Agent course, we unpacked the fundamentals of multimodal processing, starting with a short intro on Multimodality using the Sensor Fusion example in Autonomous Driving (2010+).
Then, we covered everything we need to know about Pixeltable to understand the data processing pipeline implemented in this course and also provided a few extra tutorials on advanced Pixeltable concepts.
Then we went through the implementation step by step, finishing with a detailed intro into how Speech To Text and Vision Language Models work, as we’ve used both in this course, to generate transcripts from audio, and to describe images.
In the second lesson, we’ll cover how to build a production-ready MCP Server in Python to host the complex processing pipeline described in this lesson, which will enable our Agent to call tools, resources, and fetch prompts.
Stay tuned, keep learning and start building!
Why is this course free?
This course is free and Open Source - thanks to our sponsors: Pixeltable and Opik!

References
Github, Kubrick Course: An MCP Multimodal AI Agent with eyes and ears! (n.d.). https://github.com/multi-modal-ai/multimodal-agents-course
Dipert, B. (2020, March 3). Multi-sensor fusion for robust device autonomy. Edge AI and Vision Alliance. https://www.edge-ai-vision.com/2019/01/multi-sensor-fusion-for-robust-device-autonomy/
Introduction - Pixeltable documentation. (n.d.). Pixeltable Documentation. https://docs.pixeltable.com/docs/overview/pixeltable
Wikipedia contributors. (2024, December 21). ISO base media file format. Wikipedia. https://en.wikipedia.org/wiki/ISO_base_media_file_format
Introducing whisper. (2022, April 13). OpenAI. https://openai.com/index/whisper/
Li, J., Li, D., Xiong, C., & Hoi, S. (2022, January 28). BLIP: Bootstrapping Language-Image Pre-training for Unified Vision-Language Understanding and Generation. arXiv.org. https://arxiv.org/abs/2201.12086
Luo, Y., Zheng, X., Yang, X., Li, G., Lin, H., Huang, J., Ji, J., Chao, F., Luo, J., & Ji, R. (2024, November 20). Video-RAG: Visually-Aligned Retrieval-Augmented Long Video Comprehension. arXiv.org. https://arxiv.org/abs/2411.13093
Images and Attachments
All images are created by the author, if not otherwise stated.
This is a great reader digest of how modern AI powered multi-modal "codecs"work! Pixeltable is impressively neat.
Thanks this is Very helpful, how you face the challenge of rate limit for longer video frames
like 120 frame --> "gpt 4o mini" will exceed the limit rate, right ?
and where is the pixel table storing this data , is that persistent so i can get back to it ?